


Digiscopy, part 1.
To keep my word, I am sending you a short presentation about Digiscopy,
which is a new technique for photographing distant objects.
The Godfather of this invention was Malezyan Laurenec Poh who, whilst observing birds in 1999, discovered by coincidence that he could also take a picture of the birds he was observing through the telescope with his digital camera. This technique was soon accepted primarily by nature photographers, as conditions in nature do not often allow us to get close enough to animals (or objects). 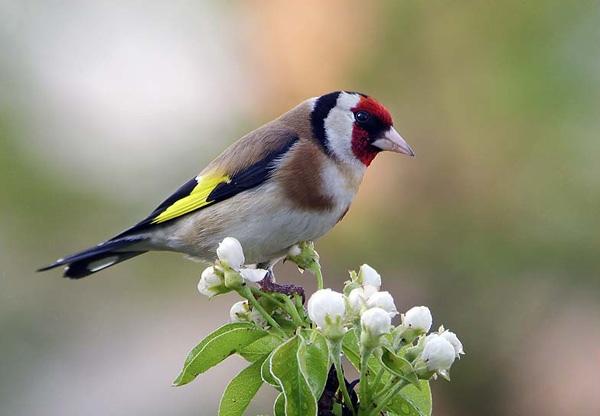  Digiscopy is also cheaper than traditional methods, as even the best telephoto lenses are not good enough with smaller birds at longer distances. The limit of telephoto lenses with tele-converters rarely exceeds 1200mm, and they are also very expensive, while Digiscopy uses considerably longer focal lengths. Digiscopy is just getting started at 20x enlargement on the telescope, with 3x zoom on the digital camera, giving an equivalent focal length of 3000mm - inaccessible to telephoto lenses. Quality is lost with distance, of course, though quite satisfactory for documentary shots. Greater enlargements on the telescope can get you even closer. Personally, I prefer to not use more than 30x enlargement of the telescope, preferring to try to get closer to the bird. 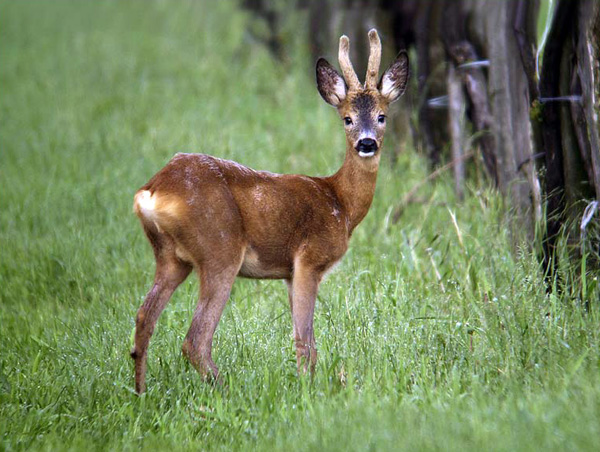 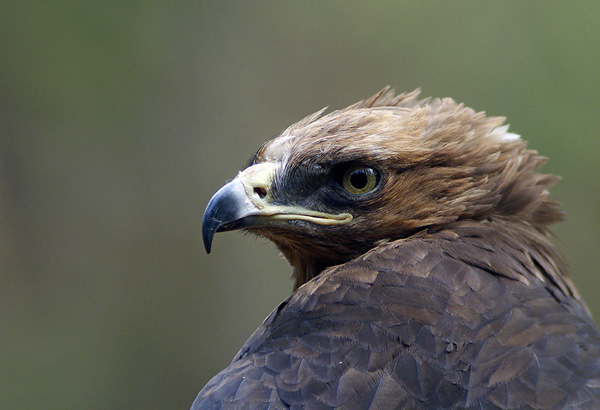 For good shots one needs, besides a good quality telescope and suitable digital camera (compact or certain DSLRs), a good tripod with a suitable head for the telescope, a telescope to digital camera adapter, and a few 'tricks of the trade' without which one can still make Digiscopic photographs but with invariably inferior results. Those of us who have been involved in Digiscopy for some time have discovered that this kind of photography needs 'leg work'. And, in a nutshell, it is crucial to know your equipment, your 'prey' and its environment very well. Whilst waiting for or stalking an animal, there is little or no time to learn - every second is important so one needs to work as quickly and quietly as possible so as not to be noticed by the animal. With Digiscopy the telescope is focussed manually, and the digital camera takes the 'apparent' picture. Early on, when compacts had smaller LCD screens and focussing through them was difficult I used to use a TV LCD screen. Later, when compacts improved and their screens became larger and higher quality, I left the TV LCD at home. The biggest problem with Digiscopy is focussing since a tiny mistake with focussing the telescope makes the picture out of focus. There is not very much equipment for Digiscopy available in the market. Some of the leading manufacturers of telescopes are Zeiss, Swarovski, Leica. The most frequently used cameras for Digiscopy are Nikon's Coolpix range. Lately, other suitable cameras have appeared. At the beginning I was using the Coolpix 885, later the 995, and recently I have tested quite a few compacts which seemed to suit with their technical specifications, but the one I have been using most recently, the Samsung Digimax V800, gave the best results. The difference between the Samsung and the others is noticeable principally in the enlargements, and it is easier to work with because of its large, high resolution LCD. 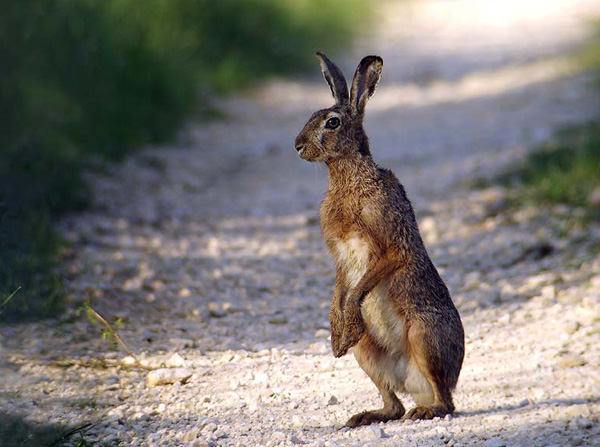 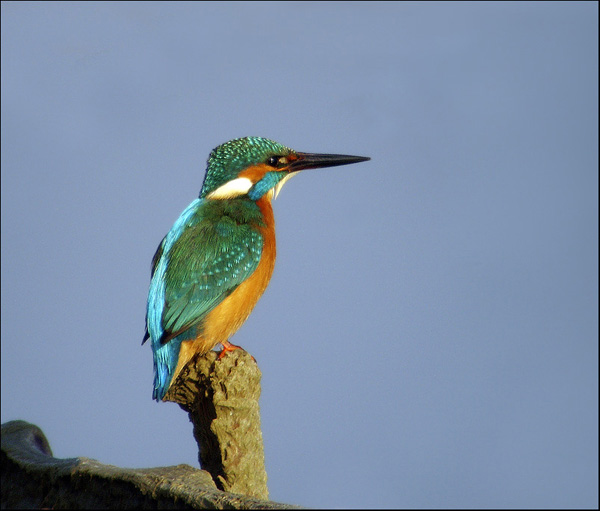 I have tested some DSLRs also but, because of some of the distinctive qualities of Digiscopy, I do not use them yet. There are quite a few DSLRs on the market which can be used with a special Zeiss adapter, with some limitations. Some manufacturers of photographic equipment are already equipping DSLRs with bigger LCDs, live preview, smaller and lighter lenses ... I will try to write more about DSLRs next time. In order to help with this basic presentation of Digiscopy, here are some photographs of the equipment from which you can see how everything fits together. The system with the Zeiss adjustable adapter
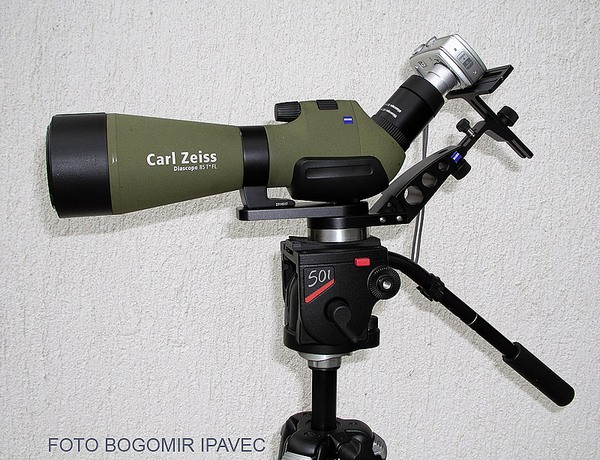 This system allows only horizontal (landscape) format (without cropping). It is very quick and easy to assemble, but the tripod needs to be as parallel to the horizon as possible. A lot of time can be spent struggling to achieve this on inclined ground, and precious seconds are lost getting near to the subject since, as previously mentioned, the telescope needs to be set horizontally with this adapter, otherwise the pictures will need cropping. The more applicable system made to my design
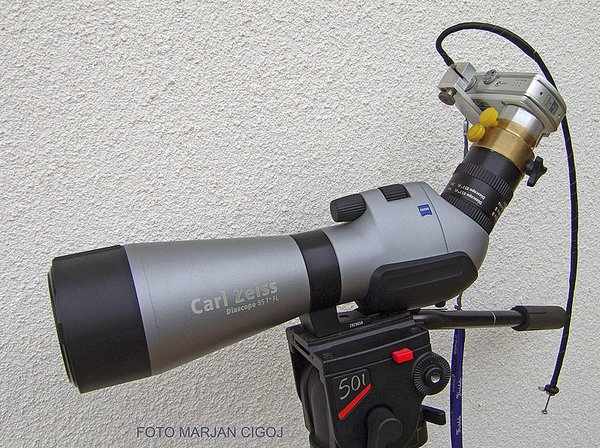 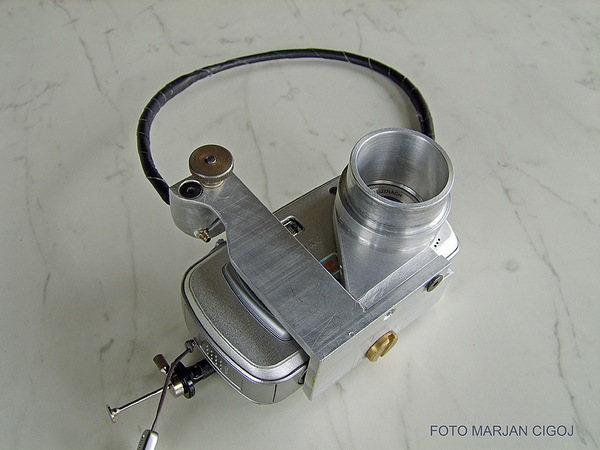 This adapter was made to my instructions by a friend also engaged in Digiscopy. The advantage of this adapter is that when one connects the camera to the telescope its position is unimportant, since it allows the camera to turn through 360 degrees - therefore including 'portrait' format. The lens of the camera is always in the centre of the ocular of the telescope, thus reducing cropping caused by 'disorientation' and the availability of 'portrait' format is a big advantage with certain birds. With herons and cormorants, for example, the 'portrait' format makes composition easier. To illustrate the quality of Digiscopy more easily, I am showing a few examples of mine. Personally, I am convinced that compact digital cameras can be used successfully in this type of photography. In the last few years of making Digiscopy pictures, I have worked towards the highest technical quality in my pictures, and have developed certain rules to which I adhere strictly. I will try to explain these, giving examples, and will try to answer any subsequent questions. Few photographs: 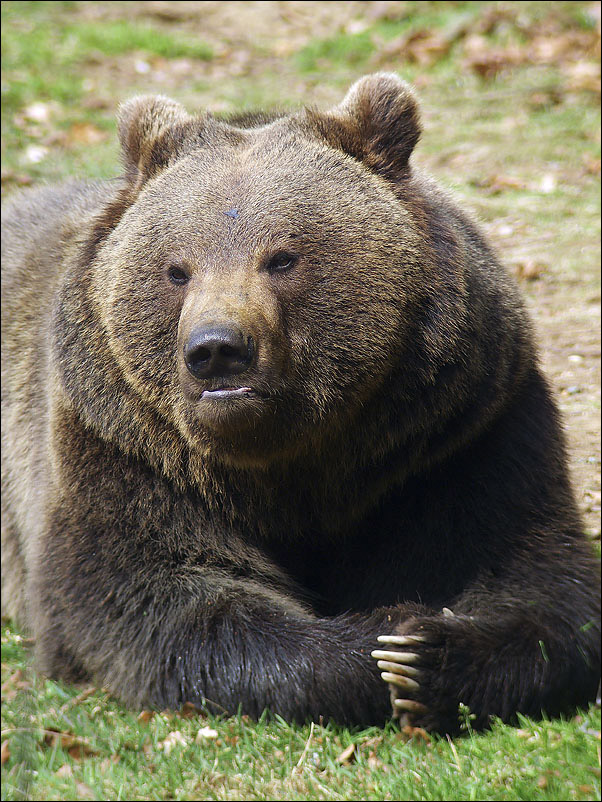 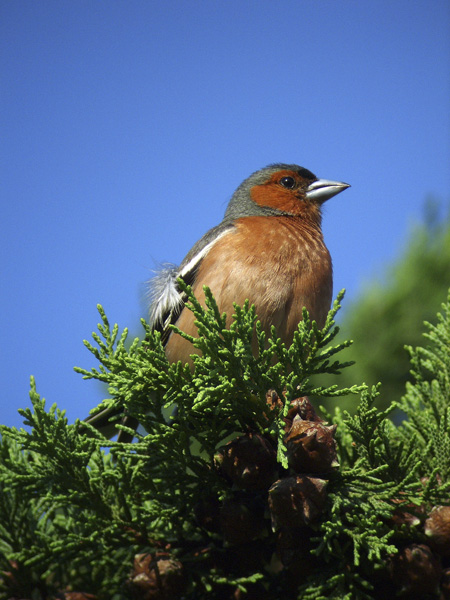 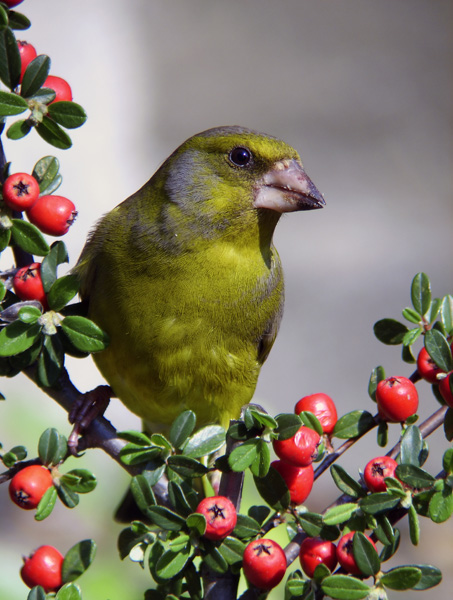 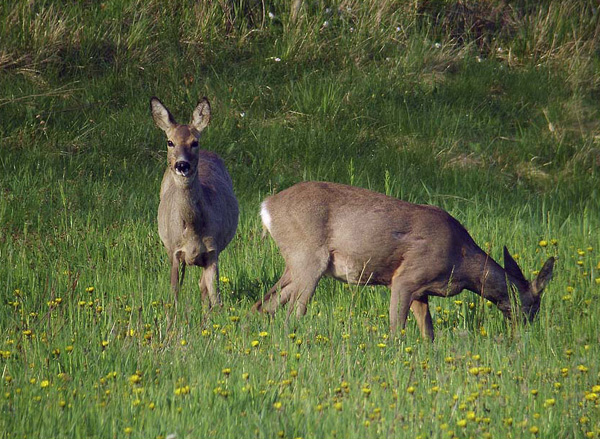 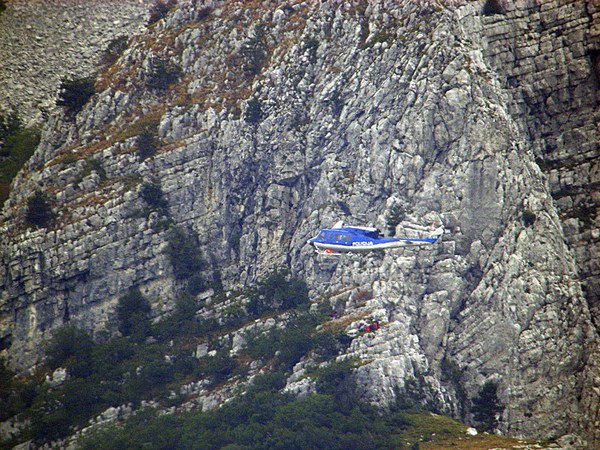 A distance of c.3.5km in very poor light Looking back over the past few years, when I started with Digiscopy the quality of my pictures was evidently inferior. There were many reasons for this: less efficient equipment, inferior correction of photographs, and I was less experienced. At that time I did not know (I was used to a film SLR) that the original photograph needs to be corrected in a computer with specific post-production programs. But after a few photographs published on the 'e-fotografija' website it became clear to me that I needed to learn at least the basic correction techniques. Since I am technically orientated by nature, and I always aim for perfection any failings just spurred me on. I attended a few computer courses and am convinced that if I had treated those early photographs with the knowledge I have now they would be much better. Unfortunately, correction is necessary to obtain high quality photos - maybe not for home use, but everything else for sure. Well, even for the home album for those special pictures. Everybody wants nice sharp photos with colour as real as when we released the shutter, yet results often differ from those desired. We usually blame the equipment, yet often it is our fault for not being thorough enough in the field. Often it is difficult or impossible to easily correct mistakes and the whole process needs to be repeated - if there is an opportunity, of course. Everyone has his own preferences and program for correcting photographs - it depends for what purpose the photographer wants to use a picture. I will not go into details of programs which I have not yet mastered, so here is my approach to correcting in short: — I try to get as natural colour as possible — I try to correct the composition — I eliminate any small and disturbing element — I try to eliminate any 'noise' but not to the detriment of detail — I try to increase the sharpness These are roughly my priorities for correction of my photographs - many experts would do this better than me, of course, especially those professionally involved in photographic post-production. It is worth bearing in mind that if one perfects technique in the field, one has less work in the 'darkroom'. This is a golden rule, at least for myself. For easier comparison, here are a few photographs taken a few years ago and recently. Taken a few years ago: 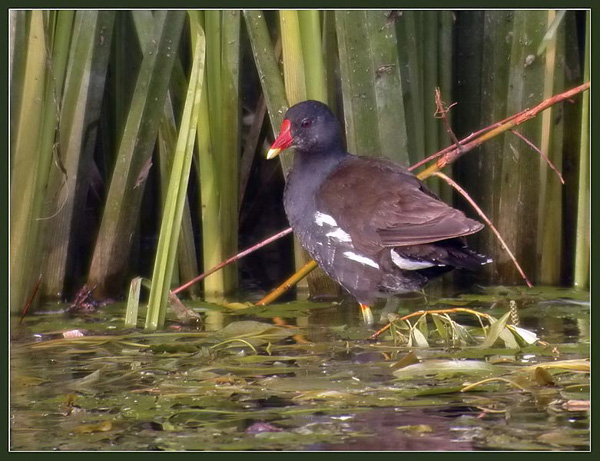 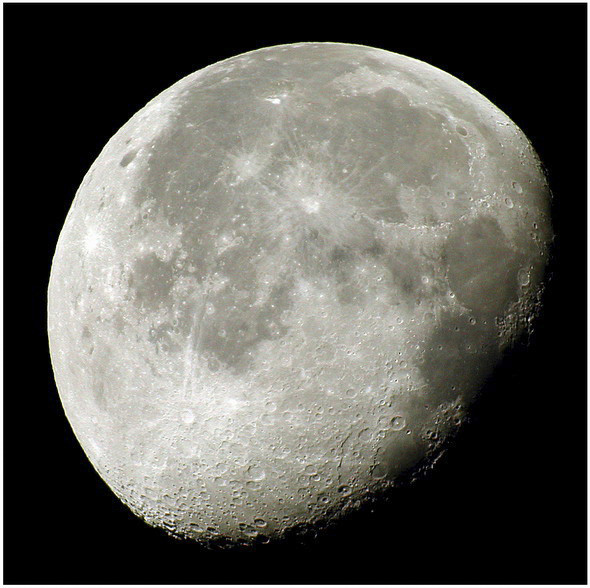 Taken recently: 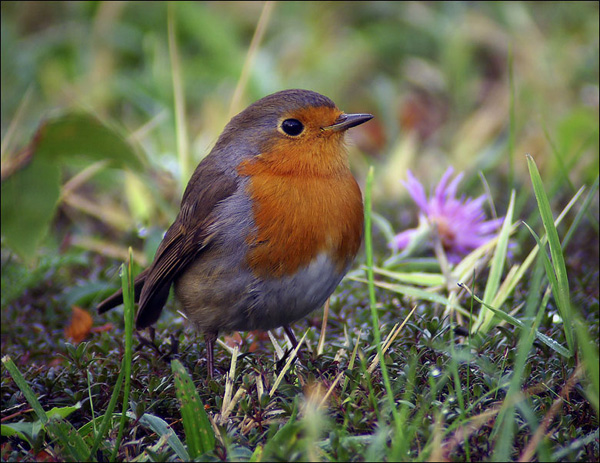   Marjan Cigoj |
| Home | Foto gallery | Digiskoping | Bird ID | Linking | Contact |
| Content of web page is protected by 2007 © Marjan Cigoj |